The terminal is one of the most important tools in a developers toolbox. It gives the power to do many things. This is why I put very careful thought into how my terminal is set up. I will show you step by step how to set up a very fast and elegant terminal that can get the job done.
Zsh
One of the best things Apple has done was make zsh the default shell for the terminal. Zsh allows for far greater customization than bash, because of this we are going to stick with using zsh.
You can check to see if your running zsh by running this:
zsh --versionIf you are using bash or any other shell and would like to switch to zsh you can do so by running the command below and then refreshing your terminal with CMD + N.
chsh -s /bin/zshiTerm
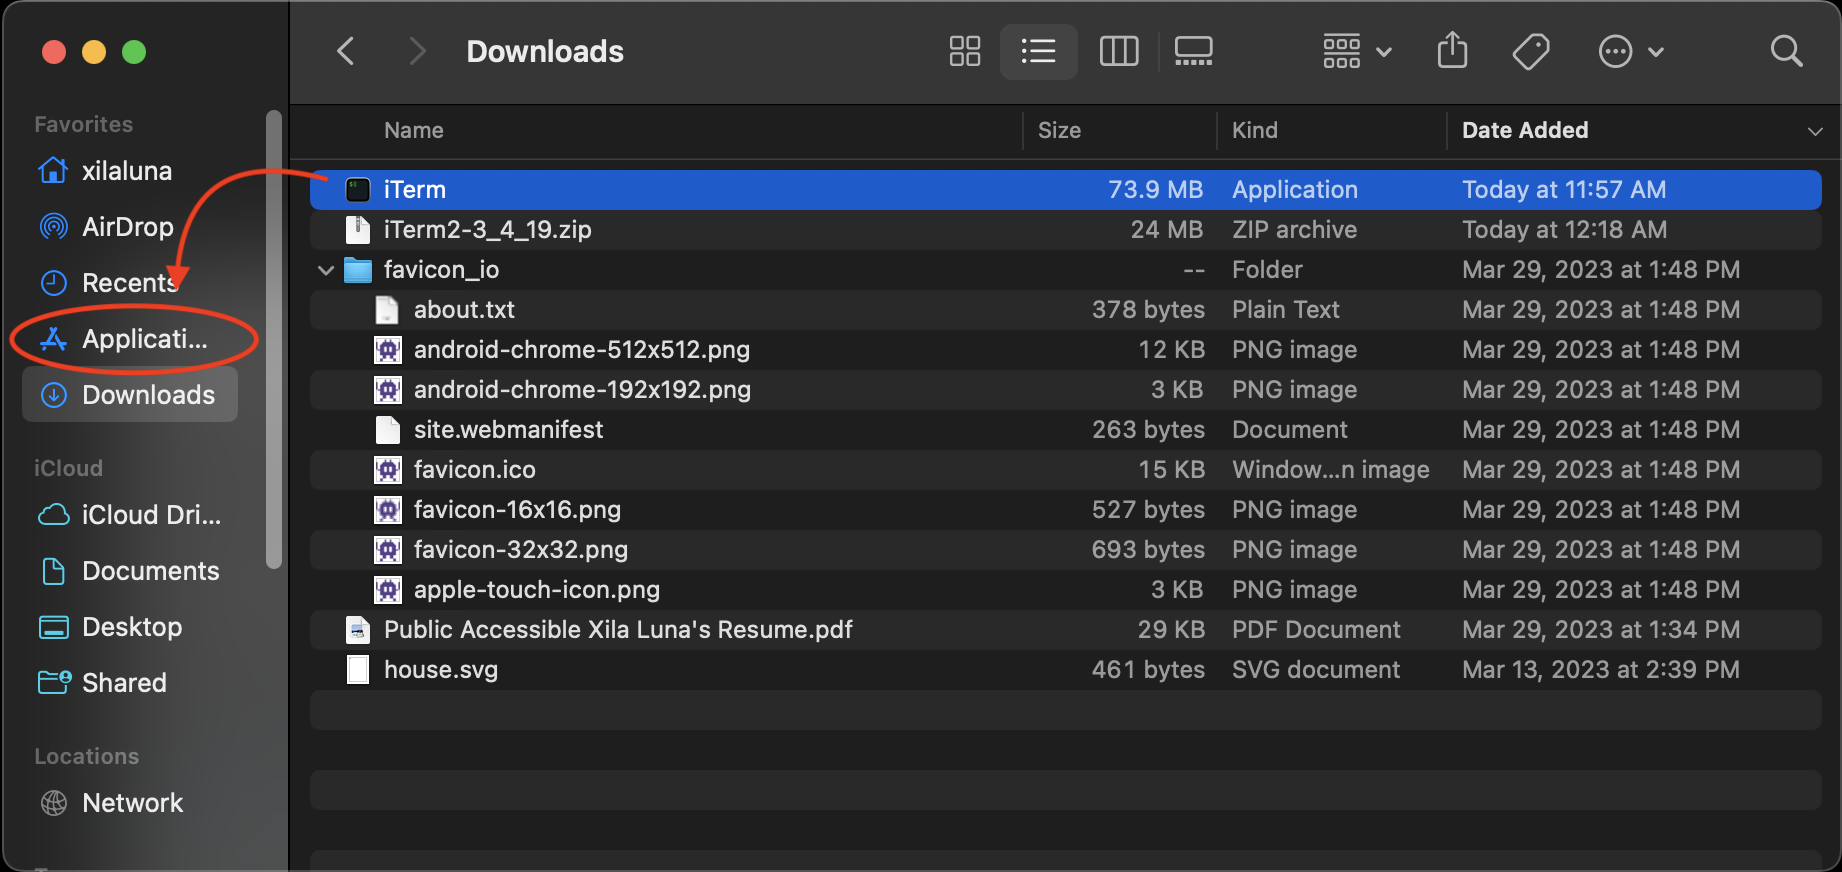
Although the default macOS terminal is great and extremely fast. There is room for improvement, specifically customization. iTerm2 is a great way to quickly add color themes, font themes and general customization. We can install iTerm by visiting this link https://iterm2.com/ and pressing download. When iTerm is downloaded we can then open the zip folder and drag the application into our applications folder.
Next is to make iTerm2 the default terminal this will help when executing specific commands. You can do this by dropping the application menu down and at the very bottom will be a “Make iTerm2 Default Terminal”.
Preferences
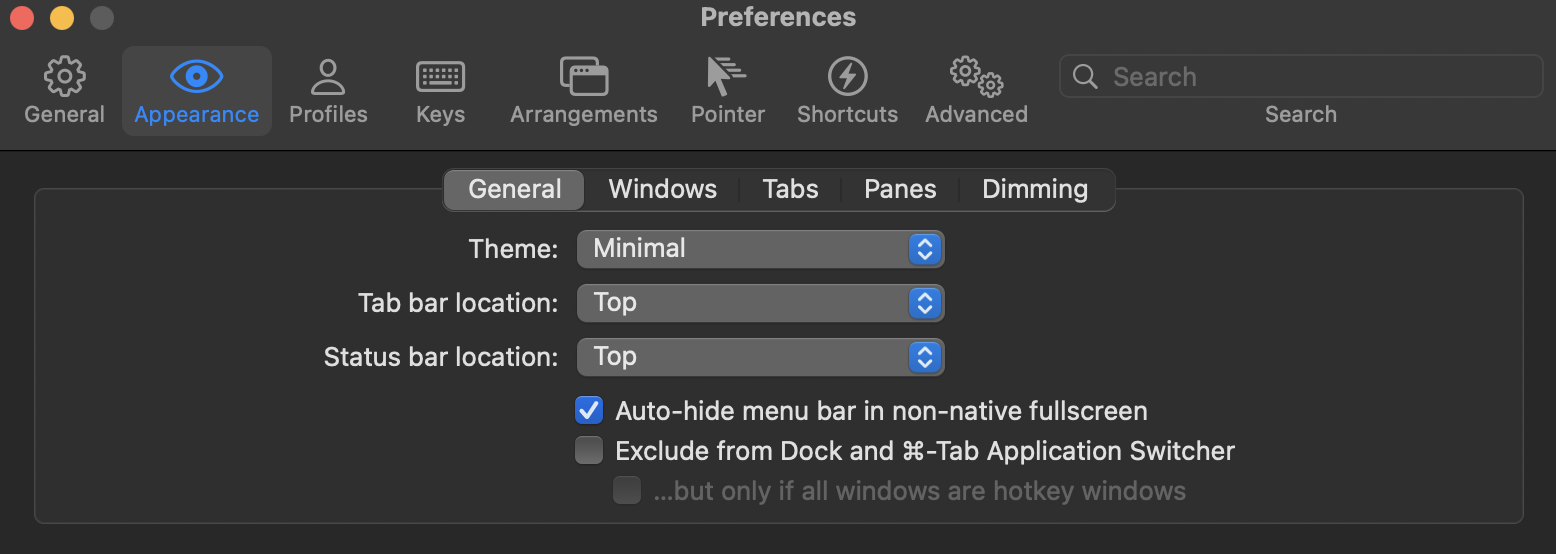
Now that we have iTerm setup functionally, we can start making it look nice. First thing I do is set the appearance to be minimal, this makes the it look more streamlined.
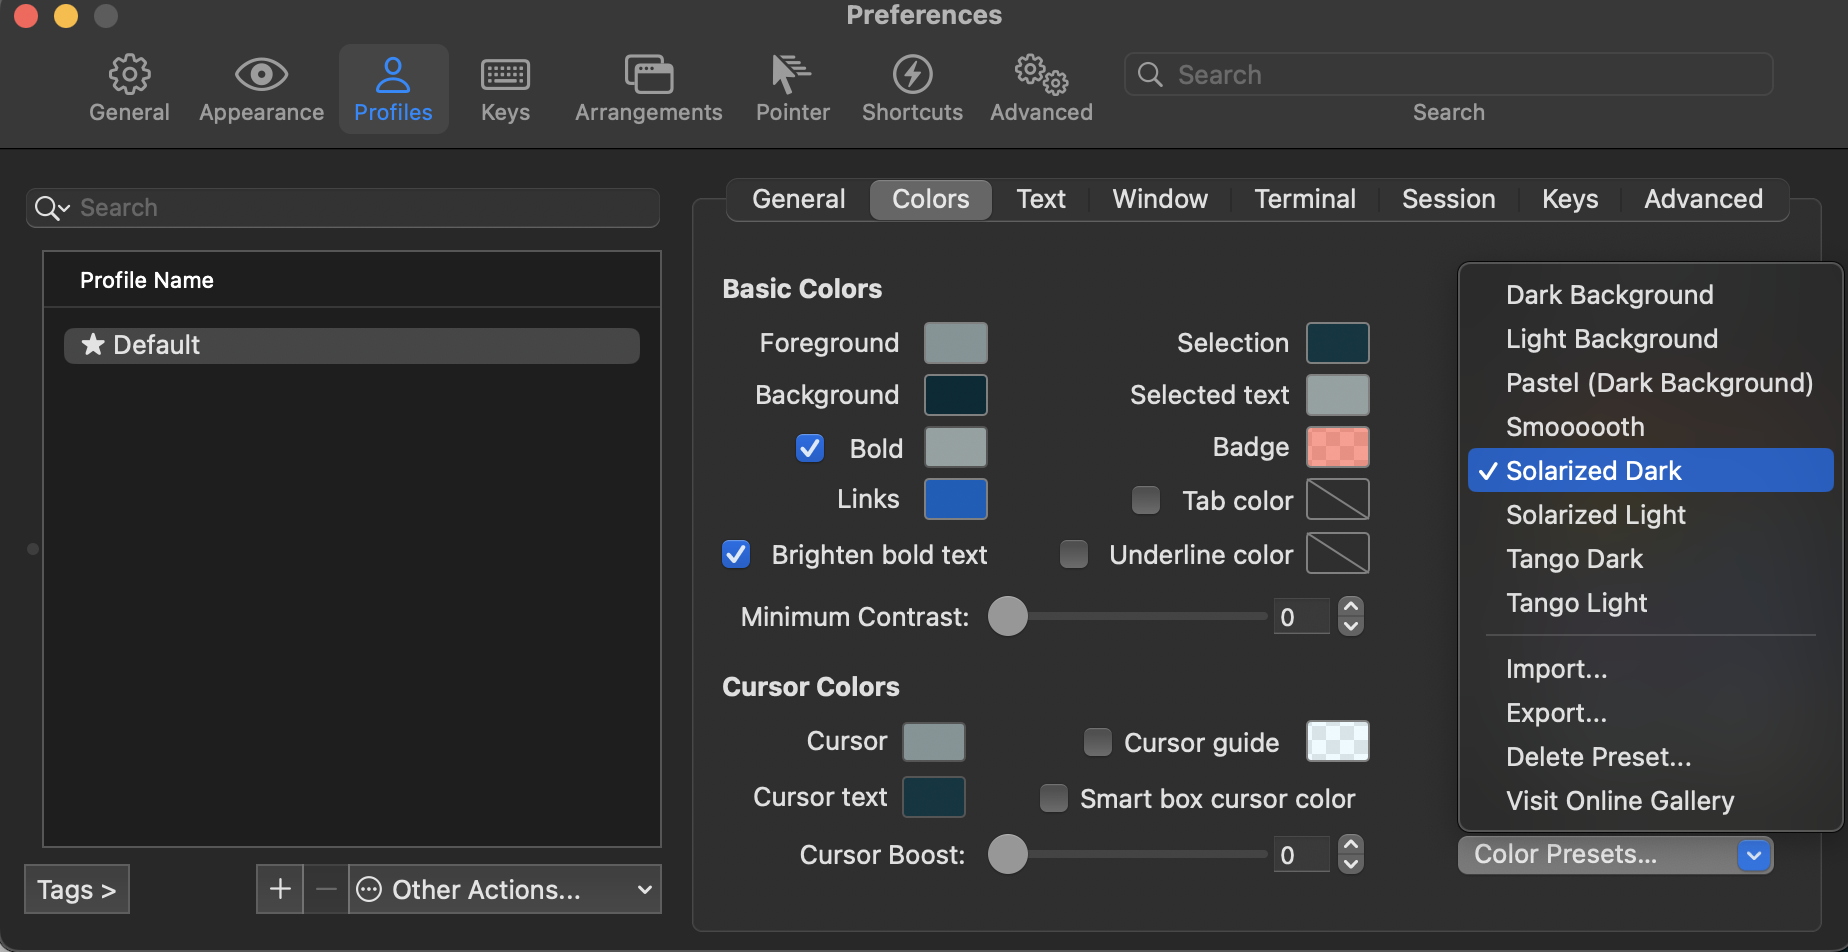
You can also change the color theme of the whole terminal in the [Profiles] → [Color Preset]. I really like the “Solarized Dark” theme. Another useful option is to enable Natural Text Editing in the [Profiles] → [Keys] → [Key Mappings].
While iTerm is great for making your terminal look colorful, it should be known that it is not necessary. If you are the type of person to prioritize speed and minimalism the default terminal is going to reign in those two categories.
Oh My Zsh
The next step on our list is to install OhMyZsh which is a framework that gives the user the ability to quickly install a whole lot of different plugins, and themes. This is going to be crucial for our terminal setup.
We can install ohmyzsh by running this curl command.
sh -c "$(curl -fsSL https://raw.githubusercontent.com/ohmyzsh/ohmyzsh/master/tools/install.sh)"You can read more about all the possibilities and the awesome community behind oh my zsh here https://ohmyz.sh/.
Powerlevel10K
As you can see our terminal is changing bit by bit. The next addition will take it one step further. Powerlevel10K is a theme that is added into OhMyZsh. Powerlevel10K adds icons and complete customization of the command line.
To install Powerlevel10K we need to clone the github repo and set it into our zsh profile. The line below will clone the repo.
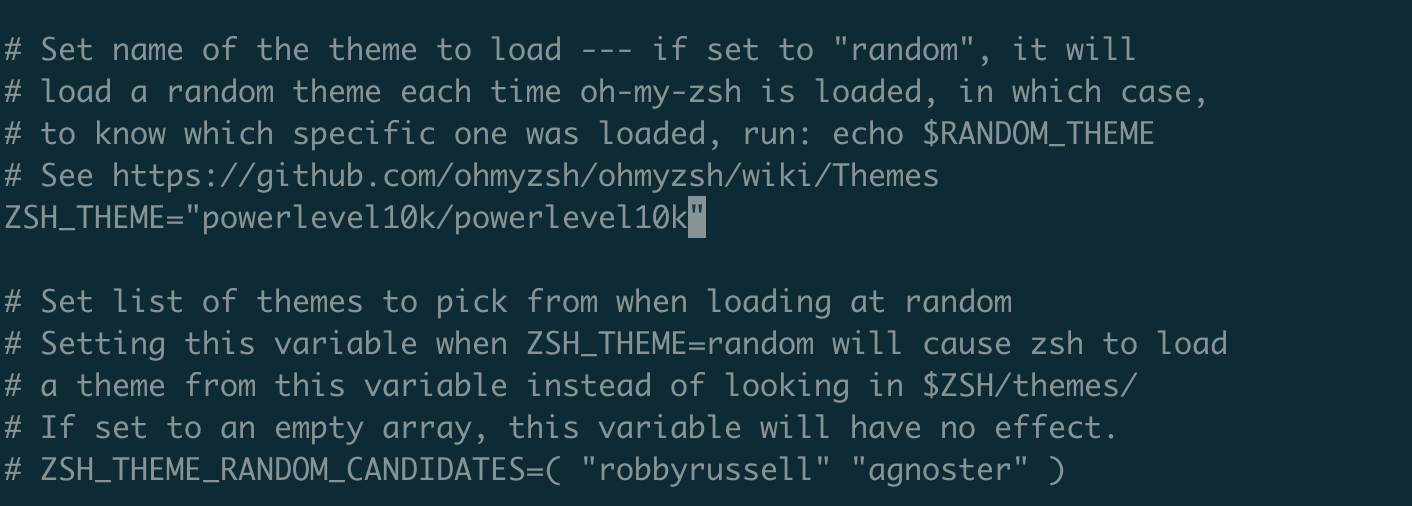
git clone --depth=1 https://github.com/romkatv/powerlevel10k.git ${ZSH_CUSTOM:-$HOME/.oh-my-zsh/custom}/themes/powerlevel10kNext we need to set ZSH_THEME="powerlevel10k/powerlevel10k” into our ~/.zshrc profile. We first need to nano into our zsh rc file like such.
nano ~/.zshrcOnce we are inside our zsh rc file we can then replace the theme inside there with “powerlevel10k/powerlevel10k”. After this is done go ahead and save the file and exit.
After this is done all that you have to do is enter the p10k configure command and your done. You now have a super personalized terminal.
Conclusion
As you can see there is a lot that goes into making a customized terminal. Customizing your terminal doesn’t stop here as well, there are plenty of plugins and tools you can add to make it even more personalized. Truly there is no limit to this space. I hope you were able to find this useful.